It's the last day of November, which means its not so bad to start getting really festive now!
All the stores have had their decorations on sale for a few weeks now, and more and more houses seem to be decked out with lights and decorations....little bit early for me, but I'm sure by next weekend we'll be digging the tree out of the attic!
I've been making lots of different things this year, as I really want this to be a fantastic Christmas. We're hosting, so it's all about the decor, the food and atmosphere, and of course, the presents! I LOVE giving Christmas presents, more so than I like receiving them. I love buying things that I just know people will love, and watching them open them and their faces light up. I've got some awesome things this year as I started really early (September, ahem!) and did a lot over eBay.
But its the decorations that I've been thinking about the most.
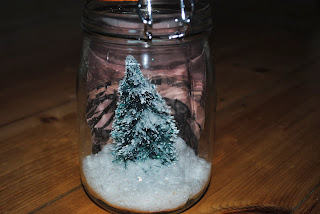
This snowglobe was so cheap and easy to make, and would be just as easy to customise to fit your theme or colour scheme this winter!
I bought a standard mason jar. I have a gazillion anyway but obviously this called
for a new one ;). The tree came from the local Garden Centre, where everything is christmaschristmaschristmas everywhere. They only had one size, so I had to buy a bigger mason jar as all of mine were too small. The snow was from there, too.
It's as easy as it looks..... I love the globes when they're done upside down, but
I wanted this one up the right way. (That's my OCD kicking in!)
I put a tiny bit of strong glue on the base of the tree and stuck it down.
It took about an hour to dry completely. Then I poured in the snow, just enough to cover the bottom of the tree, about an inch deep in the jar.
I then printed out this awesome photo of the view from our flat,
the one we moved out of recently.
Our first Christmas together was spent looking at this view, the snow, enjoying it together,
so it seemed apt to make this snowglobe a nod to the first Christmas we had together in our first home, now that we're spending our first Christmas together in our new house!
I made it more sepia so the tree would stand out more.
Then, you need to add water. I'd leave maybe 1.5-2 inches at the top,
and then add either baby oil, or what I found worked better was glycerin - you can get it from any pharmacy or chemist, and it mixes into the water unlike oil, to make the consistency thicker, so that the snow falls slower.
Obviously, you can't stick the background photo inside the jar if you're adding water,
so either tac it to the back, or do what I did and laminate it :)
So cheap, so easy, yet so effective! I have a few more different ones
to make in the next few days, so photos will follow ASAP!


No comments:
Post a Comment